

How To Install Pine Boards On Walls
The floor process now begins with training of the subfloor by setting any protruding nail heads, planing off whatsoever uneven joints, and giving information technology a thorough cleaning. Walk around the room to locate any squeaks. Since the cause of about squeaks is a loose subfloor rubbing up and down against nails, drive drywall screws into the joists below to tighten up the subfloor. With the plywood subfloor downward information technology is fourth dimension to lay the boards. Embrace the subfloor with a layer of 15 pound asphalt felt overlapping the seams by iii inches. This will help smooth out irregularities and will prevent creaking when walking on the floor. Mensurate the room's width at two more than more than points to institute an accurate centerline, and snap a chalk line parallel to your starting wall. The chalk line for the beginning board must be accurate to brand sure the outset row is straight. If the room is out of square, position the tongue of the first row parallel to the centerline and rip the groove side at an angle to the wall. Rip the first row to width using your round or miter saw. Information technology is important to leave a quarter inch gap at the wall for wood expansion. If you are running the boards perpendicular to the floor joists, cut the board ends so butt joints occur over floor joists. Exist sure to stagger butt joints from row to row so they don't line upwards across the flooring. End joints of 2 side by side rows should not be closer than six inches. Cut the boards to length with a round or miter saw. A floor nailer slips into the board'due south tongue and helps to grip each board tightly together. If you are face up nailing, yous can wedge the floorboards together using a 2 X four cut to the appropriate length and wedges. When you reach a final row, utilize a block and a pry bar to wedge the concluding boards into position. You'll feel a lot of satisfaction when your notched and slotted lath slides snugly into place. If you are looking for that well anile look with your new pine flooring, don't be afraid to drop tools, drag ladders or lumber across the flooring, take bondage and drop them on the floor. Your are attempting to produce in a relatively brusk time the natural wear and tear of a couple of hundred years. Be careful not to get overboard with the process. Source: Research, photos & text by Bryan Wright 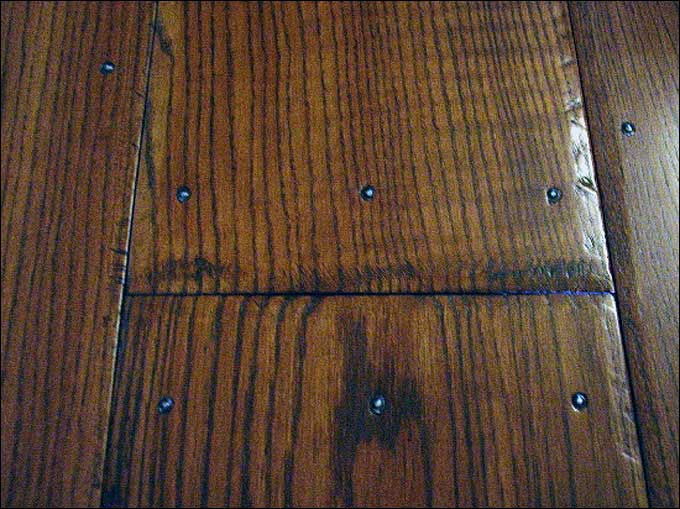
Wide pine floorboards 
Four methods of joining board edges. Top: bevelled transport-lap. Center: tongue and groove. Bottom: splint joint. Nigh wide board floors were simply butted without the use of any of these more than complicated techniques 
Floorboards run parallel with the hallway in this house congenital in 1811 
Rosehead cut nails from Tremont Blast Company, Mansfield Massachusetts. These have a twist on them that helps to keep them from pulling up from the floor. After 17 years when the floor was laid, non one has worked its manner out of the floor. 
The rosehead nails installed. 
Floorboards wedged for tight joints with 2 X 4 cut to approximate length. Wedges are placed at the terminate of the 2 X iv. Pino scraps are placed against the wall to protect the base and floorboards. Find that the finished floorboards run parallel with length of the room. Remember to place felt under the pine lath before laying. 
Painted flooring boards in a house built in 1767. Observe the different directions in which the floor is laid.
Related Links:
Tremont Nail
Wood Ideas
Colonial Sense is an advocate for global consumer privacy rights, protection and security.
All cloth on this website © copyright 2009-22 by Colonial Sense, except where otherwise indicated.
ref:T6-S5-P606-C30-M

Source: https://www.colonialsense.com/How-To_Guides/Restoration/Pine_Floorboards/How_to_Install_Pine_Flooring.php
Posted by: beachmexpeek.blogspot.com
0 Response to "How To Install Pine Boards On Walls"
Post a Comment